

iPad Programs needed for this:
Montage Magic
Photo Wizard
All panels in this tutorial were put together
with Montage Magic.
All work was done on the iPad.

ERROR: Program is Montage Magic not Photo Montage.


If you get tired and quit for a while save your work to the clip board and to the the library just in case.

For this type of collage the edges don't have to be perfect. So it's a good project to practice with.
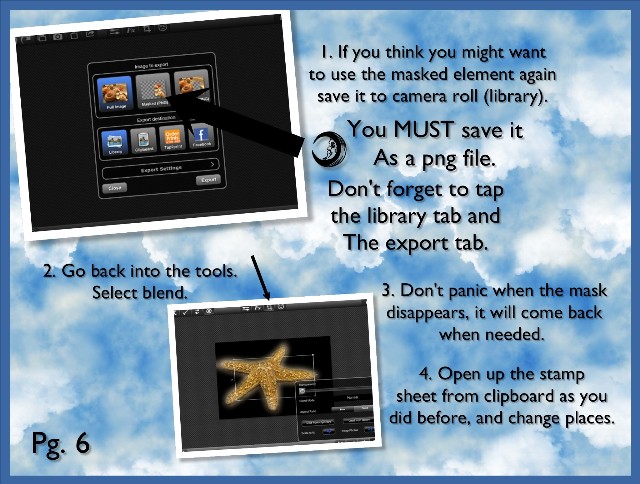 When a masked object is moved into the blend program the mask will completely disappear. When you move it to the top of the stamp it will come back. If you open up a saved png file the edges will appear black until they are placed ontop as well. They also look black saved, but if you open it into any program that supports png files it will be clipped.
The postal dingbats are easy to find. Just go any to any internet search engine and search Dead letter office ding bats.
They are free. When you hit download the iPad will offer to download in Montage Magic, just say yes. It will be there to use. There is also a couple other postage dings under other names.
Once you are done, save it to library and crop it in any program and it's ready to use.
No comments:
Post a Comment